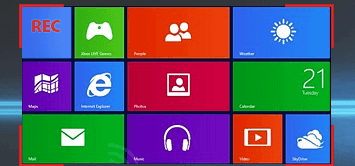
Are you looking for a way to record footage from your Windows 10 PC’s screen? If that’s the case what you need is a screen recorder that is compatible with Windows 10, and ideally one that has everything you need to record the footage that you want.
On both those fronts Movavi Screen Capture Studio would be a good option. It is a screen recorder that is compatible with Windows 10 along with most other previous versions of Windows. More importantly however it will let you easily set up and start recording the footage that you need, while letting you adjust all the recording parameters to your liking.
Learning how to record screen on Windows 10 using Movavi Screen Capture Studio won’t take long, and in fact you can start right this very moment. Just launch the software and select the ‘Record screen’ option in the menu – and you’ll be ready to get started.
The first thing that needs to be done is to click and drag the mouse cursor to draw a frame over the area of your screen that you want to record, or click on an application window to select it. Once you’ve defined the capture area through either of those methods, Movavi Screen Capture Studio’s capture interface will appear and you can then adjust the frame manually or use one of the preset sizes under ‘Capture Area’.
Before you start recording you should adjust the other recording parameters. Using the ‘System Audio’ and ‘Microphone’ icons on Movavi Screen Capture Studio’s interface you can toggle the audio source, and the sliders beside them will let you adjust the sound levels. Additionally you could set it up to record keyboard and mouse actions, adjust the frame rate, or schedule the recording to automate it.
If you’re satisfied with how the recording is set up, start recording by pressing ‘REC’. Use the on-screen controls to ‘Cancel’, ‘Pause’, or ‘Stop’ recording – or you could opt to use their hotkey equivalents instead. When you do press ‘Stop’ Movavi Screen Capture Studio will automatically save the video as an MKV file and open up a preview window. In that window you can either save it in a different format, or choose to open it in the built-in editor.
Although it may not be necessary in all cases, it can help to take advantage of the built-in editor in Movavi Screen Capture Studio. With it you can enhance the quality of your videos, cut and join segments, apply special effects, add audio tracks, insert captions, and much more. In short it will let you produce high quality and impressive-looking video content, if you choose to use its features.
All said and done being able to record your screen on Windows 10 can be useful, not just to create video content but also to save online streaming videos, Skype calls, and for many other reasons. With that in mind it makes sense to give Movavi Screen Capture Studio a try, not only because it is compatible with Windows 10, but also because of how easy it is to use.

